Note: Our site links to archery and bowhunting products sold by outside vendors, and we may earn a small commission if you purchase an item after clicking one of these links. Learn more about our affiliate program.
Choosing your first recurve bow can seem like a hurdle. There are so many bows available, each with so many different features, that selecting one to start out on can be a little intimidating. Archery is a lot of fun, but it can be tough to break into!
So we put together this post, where we discuss our picks for the best beginner recurve bow. We’ll go over each of the bows we like (including our two picks for best starter recurve bow overall), discuss the features that make them a good pick for archers who are new to target shooting and bowhunting, and we’ll try to de-mystify some of the jargon you’ll find when looking for a bow.

If you’re totally new to archery and you have no have absolutely no idea what you need to know in order to buy a recurve, we’ve included a section after the reviews titled “How to Buy Your First Recurve Bow.” In it, we discuss some terms that you’ll hear a lot (like “riser” and “takedown limbs”), some measurements you’ll need to know (like “draw weight” and “draw length”), and some FAQs that often come up (like the difference between a left-handed bows and right-handed bows, and who should be using them). You may want to read that section first, if you’re unfamiliar with archery terms.
OK! Let’s take a quick look at our picks, and then dive into our more detailed reviews.
Quick Picks At-a-Glance: Beginner Recurves
If you know all about bows—or if you’re just in a rush!—here are our “quick picks” for best recurve bows to start out on:
The Samick Sage Takedown Recurve Bow: a very popular bow, widely regarded as a great starter bow: easy to set up (we’ve included a how-to video below), easy to shoot, and has plenty of options for accessories like bow sights and string silencers;
The Southwest Archery Spyder Takedown Recurve Bow: Probably the most popular alternative to the Samick Sage, it’s another easy-to-shoot option that you can use as you develop your skills;
The Spyder XL Takedown Recurve Bow: a great beginner bow specifically made for tall folks who stand 5-foot-10 or taller;
The SAS Explorer Metal Riser Takedown Recurve Bow: a sleek model, also good for tall folks, and a colorful alternative to the Samick Sage and Spyder;
Two ready-to-shoot packages: The Samick Sage Bow and Arrow Set and the Spyder and Spyder XL Takedown Recurve Bow Ready 2 Shoot Archery Set: archery kits that come with a lot of the equipment you’ll need to shoot, including arrows and a bow case for transporting your bow; and
The Easton Youth Beginner Recurve Bow Kit: a beginner recurve for kids ages 8 and up.
OK. Now let’s get into more detail:

Our Picks for “Best Beginner Recurve Bow All-Around”
There are two “best all-around” bows that make the grade, in our humble opinion, and are good bets when you’re just starting out in archery. They are:
The Samick Sage Takedown Recurve Bow
A great beginner recurve bow with a great track record and a good reputation
Good for: righties and lefties with a draw length of up to 29 inches, who stand up to 5-foot-11 inches

- SIZE for STRENGTH & ACCURACY: The Samick Sage Recurve Bow boasts a 62” length and a 28” draw length, providing excellent stability and accuracy. Customize your shooting experience by selecting a draw weight between 25-60lb to match your skill level and strength.
- COMPLETE INCLUSION: The Samick Sage Recurve Bow comes with a robust riser, 2 durable fiberglass laminated limbs, a 14-strand Dacron bowstring, a convenient stick-on arrow rest, and comprehensive assembly instructions. The interchangeable limbs allow for easy customization and can be purchased separately for enhanced versatility and longevity.
- FLEXIBLE HAND-ORIENTATION: The Samick Sage Recurve Bow accommodates both right-handed and left-handed users. Right-handed archers hold the bow with their left hand and draw the string with their right, while left-handed archers hold the bow with their right hand and draw the string with their left, ensuring comfort and precision for all users.
The Samick Sage Recurve Bow is widely regarded as a great beginner bow, and you look at other sites like ours (but why would you?), you may find that they also suggest this bow for beginners. There are a couple reasons why the Samick is a solid choice for a new archer:
It’s got takedown limbs. We talk about this in our “How to Buy Your First Bow” section below, but takedown limbs are “screw-in” limbs that allow you to increase the draw weight of the bow as you gain strength. You can buy a Samick Sage with 20-pound limbs, shoot with it, and then when you’re ready to move up to 25-pound limbs, you take the 20-pounds limbs off and replace them with 25-pounds limbs. Most of the bows we review in this post are takedown bows, because they’re a fantastic feature if you’re just starting out in archery.
It’s easy to add accessories to the riser. If you take a look at the handle of the bow (aka, the riser), you’ll see a number of holes, where you can attach a bow sight (designed to help you aim), an arrow rest (designed to provide some stability for your arrow), and a stabilizer port (designed to give your bow some balance). Should you decide to dress your bow up, you’ll be able to do so (and we write about all the Samick Sage accessories you may want to consider in our post here).
It’s relatively simple to set up. Putting together a recurve bow can be a little bit intimidating, and they’re not like compound bows, which usually come assembled. Luckily, the Samick is pretty easy to put together, and there’s a fantastic video put out by Lancaster Archery that shows you how to do it (and we’ve included that video below).
It’s a good option for a wide range of archers. It’s manufactured in right-handed and left-handed options and in a wide range of draw weights, and at 62 inches long, it’s good for men and women up to about 5 foot 11 inches tall and with draw lengths up to about 29 inches.
There’s only one negative we should point out, and that’s about the bow string that comes with it. It’s a great starter string, but after a couple of uses, you’ll probably want to replace it, as it can get threadbare pretty quickly.
This is a really popular bow, and if you look around at your local range, you may find a few other new archers using it, as well. It’s a very solid bet, and the gateway to archery for a lot of folks.
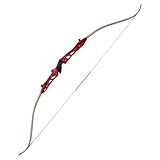
The Southwest Archery Spyder Takedown Recurve Bow
A great alternative to the Samick Sage, and a solid pick for beginners

- TAILORED FIT – Choose between 62″ or 64″ XL sizes for a personalized experience, catering to taller archers or those with a draw length exceeding 30″. This versatile archery recurve bow set suits beginners and intermediate enthusiasts, ideal for a custom fit and skill level.
- CRAFTED EXCELLENCE – Handcrafted from four woods, the riser ensures ergonomic comfort, paired with durable fiberglass maple wood limbs. Designed for left or right-handed users, it’s the choice for discerning adult archery set enthusiasts seeking premium recurve bows.
- FULLY ADAPTABLE – Preinstalled threaded bushings and reinforced limb tips cater to accessory upgrades and different string types, ensuring adaptability as your skills evolve. This recurve bow grows with you, providing the versatility desired by archers.
Good for: righties and lefties with a draw length of up to 29 inches, who stand up to 5-foot-11 inches
In recent years, there’s one bow that’s given the Samick Sage a run for its money, and that’s the Southwest Archery Spyder Takedown Recurve Bow.
It’s got a lot of the same features as the Samick Sage—it’s a takedown bow with a gorgeous riser, molded to shape the hand; it’s got a riser with lots of room for accessories, like a bow sight, quiver, or stabilizer; and it’s relatively easy to set up—screw in the limbs, use a bow stringer to fasten the bow string, set the nocking point, and you’re just about good to go. This, too, is 62 inches long, and manufactured in a wide range of draw weights, for lefties and righties, and good for men and women up to about 5 foot 11 inches tall and up to 29-inch draw lengths.
In fact, the Spyder Takedown is so similar to the Samick Sage, that it’s got more similarities than differences. The most obvious structural difference is that the Sage has limbs you can screw in with your hands, whereas the Spyder limbs require a hex key/Allen wrench. That’s not the biggest deal in the world, but it does require you to have/buy an Allen wrench in order to assemble the bow.
As for “feel,” in our experience, it feels a little bit lighter and the riser is a little easier to grip, but that’s an opinion—we couldn’t find any marketing material that discussed the weight or any design focus on the riser (which, in reality, really does look a lot like the Samick Sage!). It’s designed to have a very smooth draw—just like the Samick Sage—and that’s the biggest feature for a mid-range bow.
Both the Spyder and the Samick Sage are great beginner bows, in our humble opinion, and very sturdy and capable for being mid-range, introductory bows. Either one is a good choice.
The Spyder XL Takedown Recurve Bow
A great beginner bow for folks with a draw length of 29 inches or more
- TAILORED FIT – Choose between 62″ or 64″ XL sizes for a personalized experience, catering to taller archers or those with a draw length exceeding 30″. This versatile archery recurve bow set suits beginners and intermediate enthusiasts, ideal for a custom fit and skill level.
- CRAFTED EXCELLENCE – Handcrafted from four woods, the riser ensures ergonomic comfort, paired with durable fiberglass maple wood limbs. Designed for left or right-handed users, it’s the choice for discerning adult archery set enthusiasts seeking premium recurve bows.
- FULLY ADAPTABLE – Preinstalled threaded bushings and reinforced limb tips cater to accessory upgrades and different string types, ensuring adaptability as your skills evolve. This recurve bow grows with you, providing the versatility desired by archers.
Good for: righties and lefties with a draw length of more than 29 inches, who stand up to 5-foot-10 inches or taller
The Spyder XL Takedown Recurve Bow is the basically the same model as the last bow we reviewed: it’s got a wooden riser with a molded grip, plenty of room for accessories, and takedown limbs. It’s available for righties and lefties, and it is, in our opinion, a good option for beginner archers.
That said, it’s got one very, very important difference: it’s a longer bow—at 64 inches, it’s one of the largest bows on our “best beginner recurve bow” list—and that makes it a better choice for taller archers. If your draw length is 29 inches or more, a shorter bow may not be an effective (or safe!) choice. Archery is an equipment-based sport, and measurements matter, so it’s nice that the taller folks have this option.
With this bow, you need to look out for the draw weight. Most beginner bows are manufactured in lower draw weights, whereas this bow is manufactured starting at 30 pounds. That’s a decent amount of weight, and Spyder is counting on you tall folks to be a little stronger. We’ve included a graph of recommended draw weights below, so take a look if you’re not sure where to start.
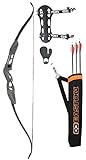
SAS Explorer Metal Riser Takedown Recurve Bow
A sleek beginner bow good for taller folks
- High Strength Casting Aluminum Riser
- Carefully Polished Finish Riser
- Strong Fiberglass Limb Made of Maple
Good for: righties only, who stand up to 6-feet-tall
If neither of those bows do it for you—say, you’re not into the wooden handle and you want something a little more colorful, or you want something a little more “modern” and streamlined—the SAS Explorer Metal Riser Takedown Recurve Bow may be a good alternative. The Explorer has a different look, but it shares a lot of the positive features that are great for beginners:
It’s manufactured at lower draw weights—at the time of this post, it’s made in 22 / 26 / 30 / and 34-pound draws, which is just about right for beginners;
It’s a takedown bow, so you can replace the limbs with stronger limbs if you want to increase the speed and force of your arrows;
The Explorer is also relatively easy to assemble, and the riser features spots for a sight, arrow rest, stabilizer, and so on; and finally
It’s 66 inches long, which is a nice surprise—that’s definitely on the longer side of things, and that makes it good folks up to 6-feet-tall. It can sometimes be difficult for taller folks to find beginner bows, so that’s great.
If you don’t like the look of the Samick Sage or the Spyder, the Explorer can be a nice alternative that has a lot of the same strengths.
The Samick Sage Takedown Recurve Bow and Arrow Set
Our pick for best beginner recurve bow kit: a ready-to-shoot package that includes a Samick Sage and features most of the equipment you’ll need to begin shooting

- READY TO SHOOT – Includes: Riser – 2 Fiberglass laminated limbs (Choose from 25 lbs – 60 lbs draw) – 14 dacron bowstring – arrow rest – 6 arrows – 2 brass nocks – stringer tool – arm guard – finger guard – quiver.
- ERGONOMICALLY DESIGNED – Samick’s risers are manufactured with imported Maple wood, for lightweight and highly durable bows, with a comfortable ergonomic grip.
- FEATURES – Pre-installed threaded Brass Bushings for various attachments and upgrades, such as, Brass Plunger, Stabilizer, Sight, Quiver, Bow fishing reel.
You may find that choosing a bow is difficult, but that getting all the related items—arrows, quivers, arrow rests, and so on—is equally difficult. That’s why we like the Samick Sage Bow and Arrow Set: it’s got the Samick Sage (the same one we reviewed above), a bow string, a bow stringer, an arrow rest, brass nocks, a finger guard, an armguard, six arrows, and—our favorite part—a quiver. Buying a quiver can be difficult—in a lot of cases, you’re never 100% certain your bow is going to fit in it until it arrives—so that’s a nice feature.
The only piece of equipment that this package doesn’t include is a bow sight. That’s a bummer, and if you’re looking for one, you may want to try the Adjustable Target Bow Sight.
No products found.
We’ve found it to be simple, quick to install, and easy to adjust.
Spyder and Spyder XL Takedown Recurve Bow – Ready 2 Shoot Archery Set
Same thing, but for the Spyder Bow

The Spyder and Spyder XL Takedown Recurve Bow Ready 2 Shoot Archery Set includes all the same equipment—string and stringer, armguard, three arrows, and a case—but it comes with the Spyder bow (it, too, doesn’t come with a quiver or a bow sight—something to keep in mind).
It can be a great option if you want the Spyder, and to get most of the equipment you need in one fell swoop.
Easton Youth Beginner Recurve Bow Kit
A smaller-size bow for the little ones aged 8 and up
- Ambidextrous design
- Package includes beginner bow, 3 arrows, hip quiver, arm guard, and finger tab
- Color is Black
So, what about all you parents out there, who are looking for a bow for your little one? If you’re looking for a beginner recurve for your child, we like the Easton Youth Beginner Recurve Bow Kit.
It’s manufactured for kids age 8 and up, and it’s sized just about right: it’s a 52-inch bow, and it can be drawn up to 26 inches (which translates roughly to a child up to 5-foot-5-inches tall), and it’s got a low draw weight, between 10 and 20 pounds—just about what a child would be able to pull.
It also includes a number of the items you’d need to get started, including three arrows, a hip quiver, three arrows fitted for the bow, an arm guard, and a finger tab, and it’s got an ambidextrous design, so it’s good for both right-handed kids and left-handed kids.
It can be a good pick for a kid, and if you’re looking for a bow for your child, there are two things we’d like to remind you:
1) Archery is a sport where you MUST supervise your children. Archery may seem like a hobby, but it’s a hobby where participants use deadly weapons. Supervise your children at all times.
2) If your child is a teen 13 or older, he/she would probably do fine with the Samick Sage or Spyder we discussed above.
Alight—that wraps it up for our reviews!
How to Buy Your First Recurve Bow
In this section, we’ll teach you all about how to buy a recurve bow. We understand that there are a lot of terms and measurements you need to know—and they’re not all self-explanatory—so we’ll go over absolutely everything in detail. By the end, you should know a whole lot about recurve bows, and hopefully know all you need to feel comfortable getting one for yourself.
We’ll Start at the Beginning: Parts of a Recurve
Recurve bows—just like the rest of archery—can get pretty complicated, but here are the main parts of a bow:

The Riser. This is “grand central” of your bow, and it’s where a lot of the action is. It’s where the grip is, so it’s where you hold the bow when you’re aiming and shooting; it’s where you place your arrows when you’re about to draw (on a section of the riser called the “arrow rest”); and it’s where you attach other important pieces of equipment to your bow, including the bow sight (which helps you aim), the stabilizer (which helps you hold the bow still), and most importantly…
The Limbs. These connect to the riser, and travel north and south, where they attach to the bow string. At the very top of the diagram, you can see we’ve placed a red dot. That’s actually the part of the bow that makes it a “recurve”—the limbs curve back towards the archer, but at the top and bottom, they curve forward (“re-curve”) again. That forward curve adds some strength to the bow, and it’s a hallmark of recurve bows. Fun fact: another hallmark of a recurve bow is that when it’s unstrung, the limbs curve forward, away from the archer.
Here’s the thing you need to know about limbs, if you’re a beginner: your bow is either going to be
1) a one-piece bow, which means that the limbs will be permanently attached to the riser (and most often, one-piece bows are made of wood), or
2) a take-down bow, with limbs that you can remove from the riser (in other words, limbs that you can “take down” from the riser).
For beginners, take-down bows are a great option, because it allows you buy a bow that has a low draw weight (and we’ll talk about draw weight in a minute), and then, as you gain experience and muscle and become a more capable archer, replace your limbs with stronger limbs, thereby making the bow more powerful. One-piece bows usually have a single draw-weight, and they’re usually a better choice for experienced archers. By the way, all of the bows we reviewed above are take-down bows.
The only downside of take-down bows is that it takes a minute or two to screw the limbs in when you start and unscrew them when you finish, but that’s not a huge deal, in the grand scheme of things, and it’s worth the option of being able to replace the limbs and make your bow more powerful as you gain strength and ability.
There’s one last piece of equipment we’ll look at, and that’s…
The Bow String. This is where you attach an arrow and draw. More on this in a minute.
Those are the main parts of a recurve bow, and as you can see, there are a few others—but we’ll skip those for now, because they’re mentioned in the video below.
With those three parts in mind—the riser, the limbs, and the bow string—you’re ready to learn about…
Measurements You’ll Need to Understand
For new archers, the measurements are the most confusing part of purchasing a new bow, so here are the measurements you’ll need to know:
Draw Weight. This is a good place to start. Draw weight is the resistance you feel when you pull on the bow string, described in pounds. A bow with a low draw weight—of, say, 15 pounds—will have a bow string that is a lot easier to pull back than a bow with a high draw weight—of, say, 60 pounds.
Draw weight is a very important measurement, because bows with higher poundage will shoot arrows faster and farther—and while that’s not the biggest deal for target archers, it’s VERY important to bowhunters (and in fact, every state has laws about the draw weights that bowhunters need to use when hunting prey—usually, it’s more than 40 pounds, so that arrows can penetrate game). A higher draw weight is more difficult to pull, but results in more speed and power.
As far as the appropriate draw weight for different types of people, it’s a little difficult to gauge what certain people can handle, but for beginners, here’s a rough outline:
Young adults (roughly 18 to 21): 15 pounds to 30 pounds of draw weight;
Adult females (21 and over): 20 pounds to 35 pounds of draw weight;
Adult males (21 and over): 25 to 40 pounds (with 40 pounds being on the very high side).
Bows are available in a wide range of draw weights, from 5 pounds all the way up to near 100, but be careful, and try not to overdo it. You may be able to easily lift 40 pounds, but pulling a 40-pound bow string, over and over and over again—that gets pretty tiring, pretty quick, and when your draw weight is too high, your arms are going to shake, and that’s not a great thing for an archer. Remember, if you’ve got a takedown recurve, you can always get limbs that have a heavier draw weight once you’re ready to move up the scales.
By the way, when talking about draw weight and pounds, archers and archery companies tend to shorten the word “pound” into “#”—so if you see someone refer to a “30# bow,” they’re talking about a bow with a draw weight of 30 pounds, and if you see someone refer to a 45# bow, they’re talking about a bow with a draw weight of 45 pounds.
Draw Length. Here’s the technical definition of a draw length: the distance, in inches, from your pivot point (which is the back of the handle of the bow), to your anchor point (which is the area of your face you pull the bowstring back to—usually the corner of the mouth).
Here’s a much simpler definition: it’s how far you pull the bowstring back during every shot.
Archers of different sizes are going to have different draw lengths, and in order to get a bow that fits you, you need to know your draw length. So how do you find your draw length? There are two ways:
1) You can go to an archery shop or outfitter and have a bow tech measure your draw length, or
2) You can take your height in inches and divide by 2.5. If you are an average-height male in the United States, you’d be 5 foot 9 inches. That’s 69 total inches (12 inches per foot times 5 feet = 60 inches, plus 9 inches = 69 inches total), so your draw length would roughly be 69 / 2.5 = 27.6 inches (rounded up to 28 inches).
Once you’ve got your draw length, it’ll be a lot easier to find a bow that fits you. Many bow manufacturers try to make things easy, and they’ll advertise their bows by saying, “Good for a draw length up to 28 inches!” or whatever. If they don’t, you can find the right bow for your draw length based on…
Bow Size. Some bow manufacturers don’t explicitly tell you what draw lengths their bows are made for, so the following chart provides generally agreed-upon bows sizes according to various draw lengths:

Here’s where it gets a little bit tricky: those are just recommendations, and many archers use—and use proficiently—bows that are a couple of inches shorter than the recommended size. So, for instance, a person with a 28-inch draw length may use a 62-inch bow, instead of the recommended 68-inch bow.
There’s a caveat to that, though: for every extra inch over the recommended height, it’ll add about 2.5 pounds of draw weight to the bow. As an example, let’s use refer to the guy we just mentioned, the one with a 28-inch draw who is using a 62-inch bow. A 62-inch bow is recommended for folks with a draw length of 22 to 24 inches, but because he’s using the 62-inch bow to go four inches beyond 24 inches—he’s pulling it to 28 inches—each of those four pounds will add an extra 2.5 pounds of draw weight. So if that 62-inch bow had a draw weight of 20 pounds, it would actually feel like 30 pounds of draw weight (20 pounds + 2.5 pounds + 2.5 pounds + 2.5 pounds + 2.5 pounds = 30 pounds).
If that’s confusing, don’t worry about it—we discuss the idea in a number of different posts, and you’ll get the hang of it. For now, rest easy and know that for all of the bows we discuss above, we’ve tried to list the draw lengths at which the bows can be used, so you don’t have to figure all that out.
Brace Height. This is the distance, in inches, from the inside of the bow grip to the bow string. Very often, bow manufacturers will list this among the attributes on their bows, but for beginners, it’s not one of the more important measurements. A shorter brace height generates more arrow speed, whereas longer brace heights are more “forgiving,” meaning that they “forgive” mistakes in the archer’s form. Most beginner bows have a brace height in the neighborhood of 7 and 1/4 inches to 8 and 1/4 inches, and it can actually be difficult to find beginner bows with a shorter/longer brace height.
Left-Hand vs. Right-Hand. This is something a lot of new archers get confused about, but once it’s explained it’s pretty simple: a left-handed bow is one where you hold the riser with your right hand, and you pull back the bow string with your left hand, and it’s used by left-handed people, and a right-handed bow is one where you hold the riser with your left hand, and you pull back the bow string with your right hand, and it’s used by right-handed people. Usually, lefties use left-handed bows, and righties use right-handed bows.
That’s how most archers choose the handedness of their bows, but there is another way to determine whether you should get a left-handed or a right-handed bow—and that’s by determining your dominant eye. Folks with a dominant left eye would shoot a left-handed bow, and folks with a dominant right eye would shoot with a right-handed bow. Most purists will say that you should use your dominant eye to determine what kind of bow you want to get (but there is some debateabout that). If you want to learn more, we also discuss the handedness vs. dominant eye debate.
How to Set It All Up
There are a lot of videos online, and we’ll venture to say that the great majority of them are garbage. The following video from Lancaster Archery, however, is an absolute gem. It shows you, step-by-step, how to set up a Samick Sage so that you can use it minutes after it arrives to you. Take a look:
We’ve been meaning to make a video like that, but for now, we’re glad to refer you to this one!
And… That’s All Your Need to Know to Get Started!
If you’ve made it this far, congratulations! You know the basics of recurve-bow buying, you’ve got an idea of your options for best recurve bow for beginners, and you’ve learned quite a bit in a fairly short amount of time. We’ve written plenty of other posts about how to get started in archery, so check those out if you want to learn more, and…
Welcome! There’s a weird bond that exists among a lot of archers, and hopefully you’ll find a community of archers you can hang out with and learn from. Have fun, learn well, and happy shooting!